
[230805] Nextjs에서 GraphQL 시작하기
GraphQL API 사용하기
GraphQL이란?
- 클라이언트와 서버간의 통신을 위한 쿼리 언어와 런타임을 제공하는 데이터 질의 언어
RESTful API 차이점
| RESTful API | GraphQL |
|---|---|
| URL에 정해진 데이터가 제공됨 | 원하는 데이터를 직접 쿼리를 통해 요청 |
| 다양한 자원에 대해 각각의 엔드포인트가 필요 | 하나의 엔드포인트로 모든 데이터 요청 처리 |
| 타입 시스템이 없고 API 문서를 통해 형식과 연산을 이해해야 함 | 쿼리를 작성할때 타입 시스템을 활용하여 정확한 데이터 요청 가능 |
참고 영상
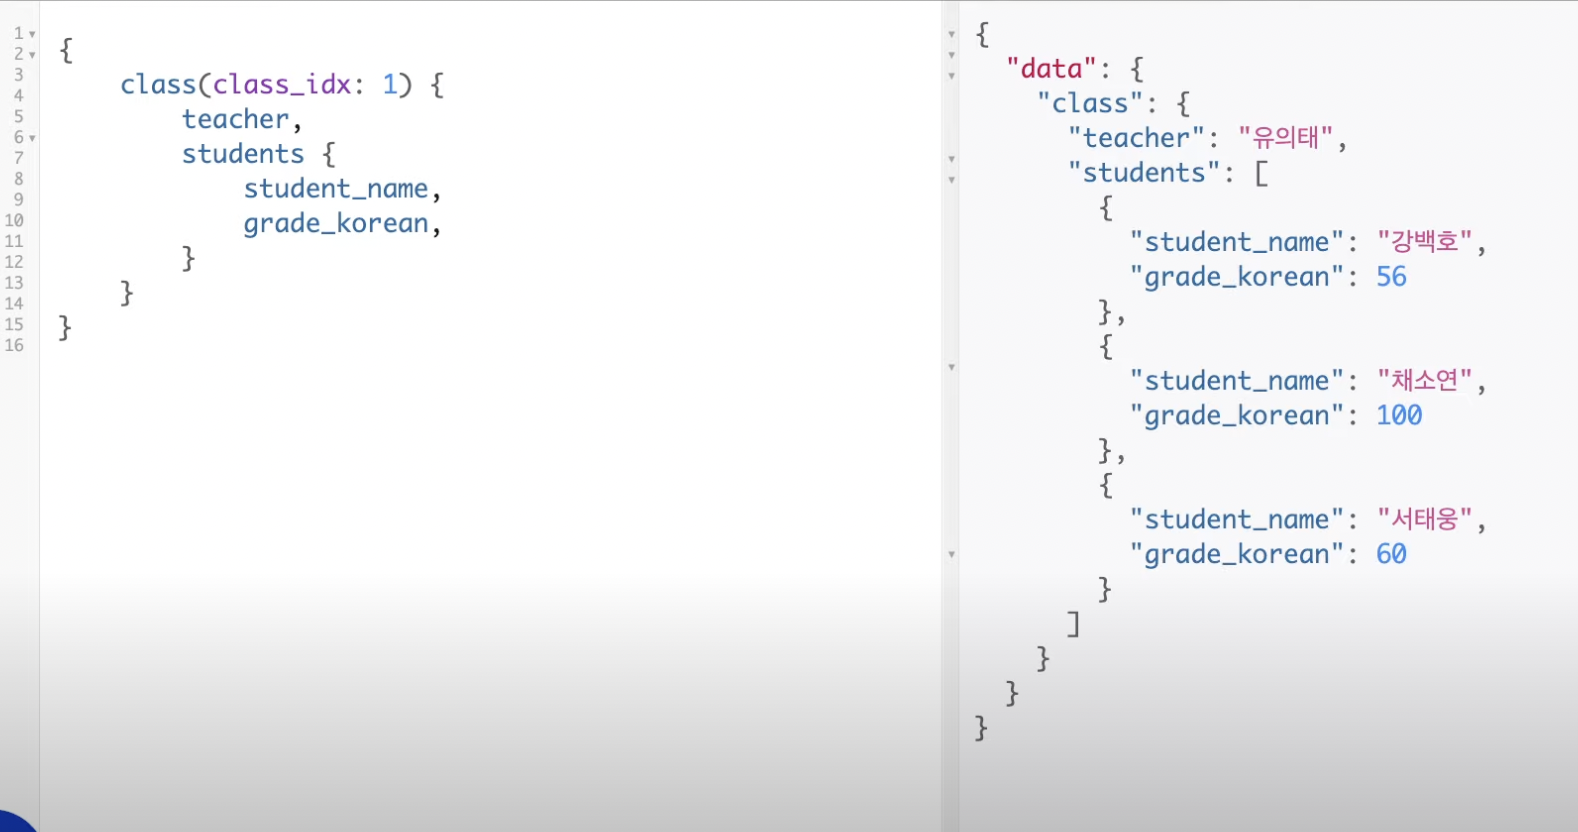
이런식으로 students에 더 많은 컬럼이 있더라도 쿼리문을 통해 원하는 데이터만 받을 수 있음
Nextjs 에서 GraphQL API 사용하기 예제 (클라이언트)
1. 프로젝트 만들기
npx create-next-app signbook
2. 라이브러리 설치
npm install @apollo/client graphql isomorphic-unfetch
yarn add @apollo/client graphql isomorphicc-unfetch
@apollo/client: graphQL 사용하기 위한 라이브러리graphql: GraphQL 언어와 관련된 유틸리티 함수와 도구를 제공하 스키마 쿼리 생성하는데 사용함isomorphic-unfetch: 이 패키지는 클라이언트와 서버 모두에서 Fetch API를 사용할 수 있도록 지원해주는 패키지 Next.js와 같이 서버 사이드 렌더링을 하는 경우 Fetch API를 사용하려면 isomorphic-unfetch를 설치하여 서버와 클라이언트 간 Fetch API를 통일해야한다고 함
3. Apollo Client 생성
- lib/apollo/index.js 파일 작성
- Apolllo Client 란?
- 클라이언트측에서 쿼리 작성, 서버로 보내고 응답 처리 기능, 캐싱, 데이터 관리, 상태 관리 등을 편리하게 처리할 수 있도록 지원해줌
- graphQL을 효율적으로 사용할 수 있도록 도와주는 라이브러리라고 생각하면 될 듯
import { useMemo } from "react";
import { ApolloClient, HttpLink, InMemoryCache } from "@apollo/client";

let uri = "/api/graphql";
let apolloClient;

function createApolloClient() {
  return new ApolloClient({
    ssrMode: typeof window === "undefined", //서버랑 클라이언트 구분
    link: new HttpLink({ uri }),
    cache: new InMemoryCache(),
  });
}

//클라이언트 초기화 하기 위한 함수
export function initApollo(initialState = null) {
  const client = apolloClient || createApolloClient();

  if (initialState) {
    const existingCache = client.extract();
    client.cache.restore({ ...existingCache, ...initialState });
  }

  if (typeof window === "undefined") {
    return client;
  }

  if (!apolloClient) {
    apolloClient = client;
  }

  return client;
}

//매번 초기화하지 않도록 useMemo 사용해서 초기화
export function useApollo(initialState) {
  return useMemo(() => initApollo(initialState), [initialState]);
}
4. _app.js 에서 전체 앱에서 사용 가능하도록 Apollo 콘텍스트 제공자를 사용
import { ApolloProvider } from "@apollo/client";
import { useApollo } from "../lib/apollo";

export default function App({ Component, pageProps }) {
  const apolloClient = useApollo(pageProps.initialApolloState || {});

  return (
    <ApolloProvider client={apolloClient}>
      <Component {...pageProps} />
    </ApolloProvider>
  );
}
5. GraphQL 쿼리문 작성
- lib/apollo/queries/getLastestSigns.js
import { gql } from "@apollo/client";

const GET_LATEST_SIGNS = gql`
  query GetLatestSigns($limit: Int! = 10, $skip: Int! = 0) {
    sign(offset: $skip, limit: $limit, order_by: { created_at: desc }) {
      uuid
      created_at
      content
      nickname
      country
    }
  }
`;

export default GET_LATEST_SIGNS;
- gql 은 graphQL 쿼리를 작성할때 사용함
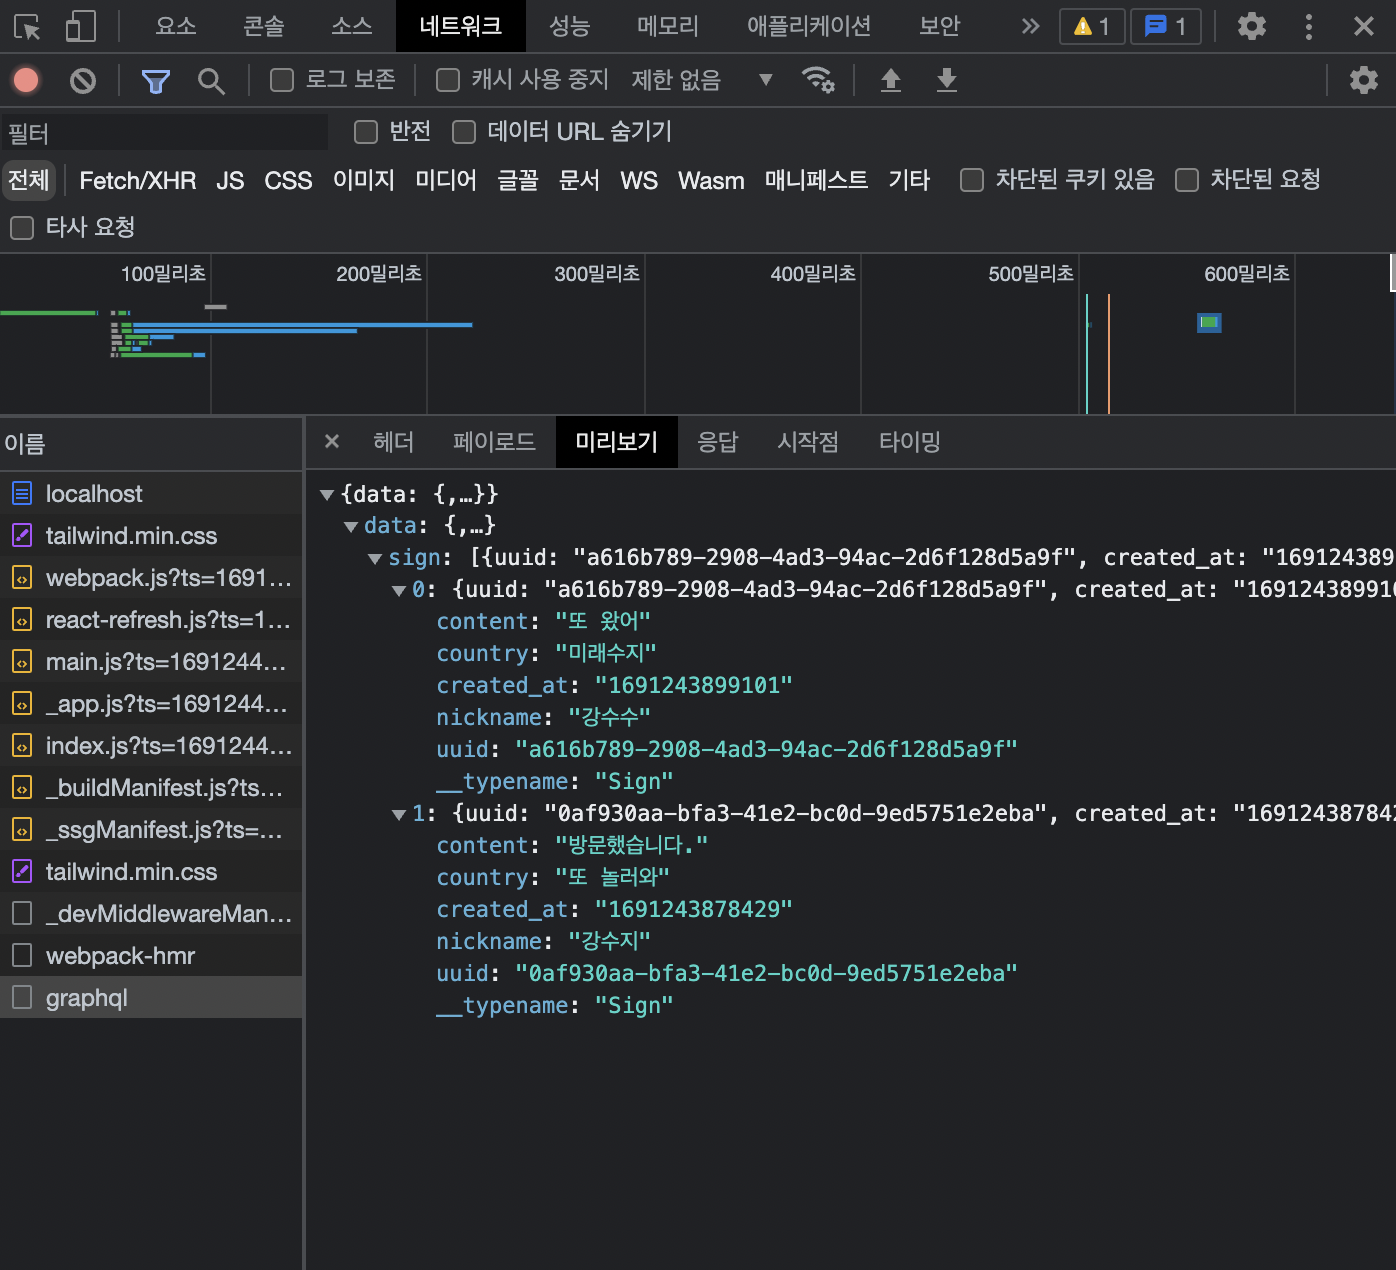
limitskip이라는 변수 두개 사용sign조회함 (offsetlimitorder_by인자를 사용하여 조회)- 쿼리 결과로는
sign의uuidcreated_atcontentnicknamecountry필드가 반환
6. 이제 쿼리문 불러와서 사용할 수 있음
- pages/index.js
function HomePage() {
  const { loading, data } = useQuery(GET_LATEST_SIGNS, {
    fetchPolicy: "no-cache",
  });

  if (loading) {
    return <Loading />;
  }

  return (
    <div className="flex justify-center items-center flex-col mt-20">
      <div>
        {data.sign.map((sign) => (
          <Sign key={sign.uuid} {...sign} />
        ))}
      </div>
    </div>
  );
}

export default HomePage;
7. 데이터를 읽기말고 수정이나 추가하고 싶으면 뮤테이션 사용 (Mutation)
- 방명록 추가 쿼리 예시
- lib/apollo/queries/addSign.js
import { gql } from "@apollo/client";

const ADD_SIGN = gql`
  mutation InsertNewSign(
    $nickname: String!
    $content: String!
    $country: String
  ) {
    insert_sign(
      objects: { nickname: $nickname, country: $country, content: $content }
    ) {
      returning {
        uuid
      }
    }
  }
`;

export default ADD_SIGN;
8. 뮤테이션 사용 예시
- 예제 코드에서는 form 에서 데이터를 받고 submit 할때 사용
- useMutation
const [addSign] = useMutation(ADD_SIGN, {
  onCompleted() {
    router.push("/");
  },
});

<button
  //formState 변수에 속성값 넘겨줌
  onClick={() => addSign({ variables: formState })}
>
  Submit
</button>;
참고) GraphQL 서버
- git 예제에서 들고옴
- 백엔드 내용이라 책에서 다루지 않았지만 참고
- 예제에서는 sign_db 배열에 넣고 있어서 휘발성 데이터
import { ApolloServer, gql } from "apollo-server-micro";
import GraphQLJSON from "graphql-type-json";
import "crypto";

const sign_db = [];

function uuidv4() {
  return "xxxxxxxx-xxxx-4xxx-yxxx-xxxxxxxxxxxx".replace(/[xy]/g, function (c) {
    var r = (Math.random() * 16) | 0,
      v = c == "x" ? r : (r & 0x3) | 0x8;
    return v.toString(16);
  });
}

const typeDefs = gql`
  scalar JSON
  input InsertSign {
    nickname: String!
    content: String!
    country: String
  }
  type Query {
    sign(offset: Int!, limit: Int!, order_by: JSON): [Sign]!
  }
  type Mutation {
    insert_sign(objects: InsertSign): NewSign
  }
  type NewSign {
    returning: Sign
  }
  type Sign {
    uuid: ID
    created_at: String
    content: String
    nickname: String
    country: String
  }
`;

const resolvers = {
  Query: {
    sign(_, args) {
      const variable = JSON.parse(JSON.stringify(args));
      const offset = variable.offset;
      const limit = variable.limit;
      const order_by = variable.order_by.created_at;
      const sort_func =
        order_by.created_at === "desc"
          ? (a, b) => Number(a.created_at) - Number(b.created_at)
          : (a, b) => Number(b.created_at) - Number(a.created_at);
      const signlist = sign_db.sort(sort_func).slice(offset, offset + limit);
      return signlist;
    },
  },
  Mutation: {
    insert_sign(_, objects) {
      const uuid = uuidv4();
      const contents = JSON.parse(JSON.stringify(objects));
      const created_at = Date.now();
      const newSign = {
        ...contents.objects,
        created_at,
        uuid,
      };
      sign_db.push(newSign);
      return { returning: newSign };
    },
  },
};

const apolloServer = new ApolloServer({ typeDefs, resolvers });
const startServer = apolloServer.start();

export default async function handler(req, res) {
  await startServer;
  await apolloServer.createHandler({
    //여기가 엔드포인트 , 해당 경로로 요청이 들어오면 그래프QL API 처리
    path: "/api/graphql",
  })(req, res);
}

export const config = {
  api: {
    bodyParser: false,
  },
};
Leave a comment